When you purchase a pattern from The Sewing Revival, you will receive it in 3 sizes. (some of the older patterns come in 4 sizes but we are transitioning to 3). You should select the size that best suits you and you will receive the size above and below. This is super helpful if you are "in between" sizes, or if you are a split size (for example, a size 12 bust and a size 14 hip), because it allows you to adjust the pattern size to better fit your body shape.
This blog will take you through the process of adjusting a dress pattern for a person with a size 12 bust and a size 14 hip (a traditional "pear" shape), but the principles are the same for any mixed body shape.
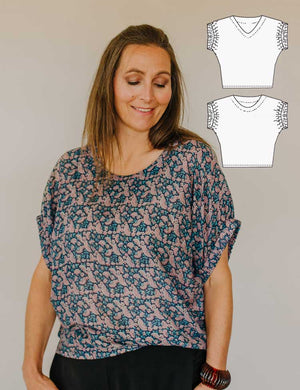
The example used is the Stitchbird Dress, but the same applies for most garments.
Before we begin, it is important to understand the difference between the SIZE CHART measures and the FINISHED GARMENT measures:
Size Chart measurements measure your body shape.
Finished garment measurements measure the finished garment. This is the body size plus the extra "ease" or "exra room" added for the garment style. If the finished garment measurements were the same as the size chart, the garment would fit you exactly - and if it was made of woven material you wouldn't be able to move. It was made with stretch, it would be like wearing a wetsuit or lycra suit. The amount of "ease" is determined by the designer when creating the style. A garment with lots of ease is loose fitting, a garment with less ease is more tailored and sits closer to the body.
You should always choose your size from the Size Chart measures, because the finished garment measures reflect the designers ease for each pattern (which determines how it sits on your body), not your body size.
However, what happens if you are a mix between sizes?
Let's say you are a size 12 chest (you measure 95cm around the chest) and a size 14 hip (you measure 109cm around your hip).
In this case, it is important to take note of several things:
1) Consider the garment style - if there is a lot of ease in the style, the garment is loose fitting (like the Tui dress and Stitchbird dresses), then choosing the smaller size (without adjustment) may still work just fine because there is enough ease in the style to make it work.
To work this out you would refer to the finished garment measures which, in our example, says that a size 12 Stitchbird Dress measures 127cm chest and 121cm hip. Based on a 95cm chest and 109cm hip example, there is still enough ease in the hip area (121-109 = 12cm total). 12cm around the hip is the same as 3cm either side on the half. In the diagram below, the width at point A (hip) is 3cm on half of the front, equating to 12cm ease all the way around. This is more than enough (there is plenty of ease in this style to accommodate a bigger hip).

The ease at point B in the diagram above (the chest) is 32cm (127cm-95cm) which is 8cm on the half front. The style is very loose at this point which is created by the cross over pleat at the back (per the design intention).
2) The recommended fabric. Knit and stretch fabrics are naturally more "forgiving" than woven fabrics as they stretch with the body. Woven fabrics do not change so there needs to be a little more attention given to finished measurements. The only exception to this is a woven fabric cut on the "bias" (learn more about that here). Check out whether a pattern will still fit without adjustment if the fabric will stretch enough to accommodate.
3) If you are "in between" sizes and the style is more fitted (like the Nikau dress), and the recommended fabric will not allow any stretch to accommodate a larger hip, then you need to pay more attention to the Finished measurement chart and grade between sizes.
The Sewing Revival patterns make this easy by providing patterns in several sizes and once opened in Adobe reader, you can choose to print one, or several sizes using the layers option (more about how to do this here). If you need to grade between size 12 and 14, you need to print both size 12 and 14 layers to begin with.
Once you have printed the pattern (and stuck it together), you need to adjust the pattern before you cut it out.
HOW TO GRADE BETWEEN SIZES:
Using an example of a size 12 bust and size 14 hip:
1. Print both the size 12 and 14 size layers and tape the pattern but do not cut it out.
2. You need the size 12 top section and the size 14 bottom so you need to join these 2 sizes together in a gradual line. To do this, draw a line in pencil from the size 12 waist to the size 14 hip on the bodice. You will need to make sure the same line is as smooth as possible, following the original style curve and that the same curve is drawn on both the front and back pattern pieces. In the example of the Nikau dress below, the best place to grade is along the in-seam pocket as this sits between the waist and the hip. You may also like to adjust the shape of the pocket edge as well (without adjustment, the pocket will sit on a slightly different angle which will not affect the garment significantly).

3. Repeat for the front and back bodice pieces.
4. Cut out the paper pattern on the new lines. Your pattern will reflect a size 12 chest and size 14 hip.